Step 2: Adding a Switch to Control the LED
In the previous step, we lit up our first LED using a resistor and two AA batteries. This time, we’ll make it practical — by adding a switch so we can turn the LED on and off without moving wires.
Why Do We Need Switches?
A switch is one of the simplest and most useful components in electronics. It either connects or disconnects a circuit. Without switches, every time we wanted to turn something off, we’d have to remove a battery or a wire.
Switch Types (SPST, SPDT, DPDT)
- SPST (Single Pole, Single Throw): The simplest switch — it just connects or disconnects one line. Perfect for our LED on/off.
- SPDT (Single Pole, Double Throw): One input, two outputs. Lets you select between two connections (e.g., route power to one of two LEDs).
- DPDT (Double Pole, Double Throw): Two SPDTs in one body. Commonly used for reversing connections (e.g., motor direction), but overkill for this step.
Markings You’ll See (ON, OFF, ON-(OFF), OFF-(ON))
- ON–OFF: Latching. Stays in ON or OFF until you flip it.
- ON–(OFF): “Momentary OFF.” Normally ON, but temporarily disconnects while pressed and springs back.
- OFF–(ON): “Momentary ON.” Normally OFF, but connects while pressed and springs back.
- ON–ON: Latching between two ON positions (typical for SPDT).
For this project, choose a stable ON–OFF switch (not momentary).
Switch Ratings (Current & Voltage)
Switches have ratings like 0.5 A 50 VDC that indicate what they can handle safely. If a switch is undersized, it may not fail immediately, but it will heat, wear out faster, or become unreliable.
Our LED circuit draws only a few milliamps at 3 V, so even tiny switches are fine. Still, check ratings before buying so you develop good habits for later, higher-power projects.
Parts You’ll Need
- Breadboard (recommended: type with detachable power rails and adhesive backing)
- 2 × AA batteries in a holder (≈ 3 V total)
- 1 × LED
- 1 × resistor ≈ 220 Ω (any nearby value works; it doesn’t need to be exact)
- 1 × SPST ON–OFF switch
- Premade male–male jumper wires for neat, easy connections
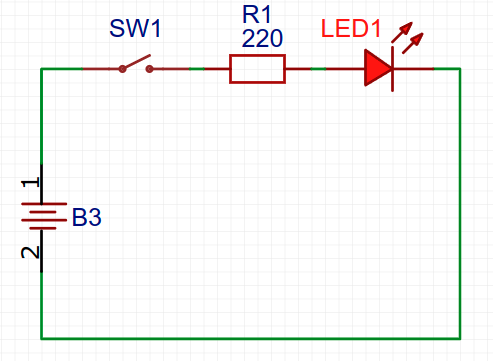
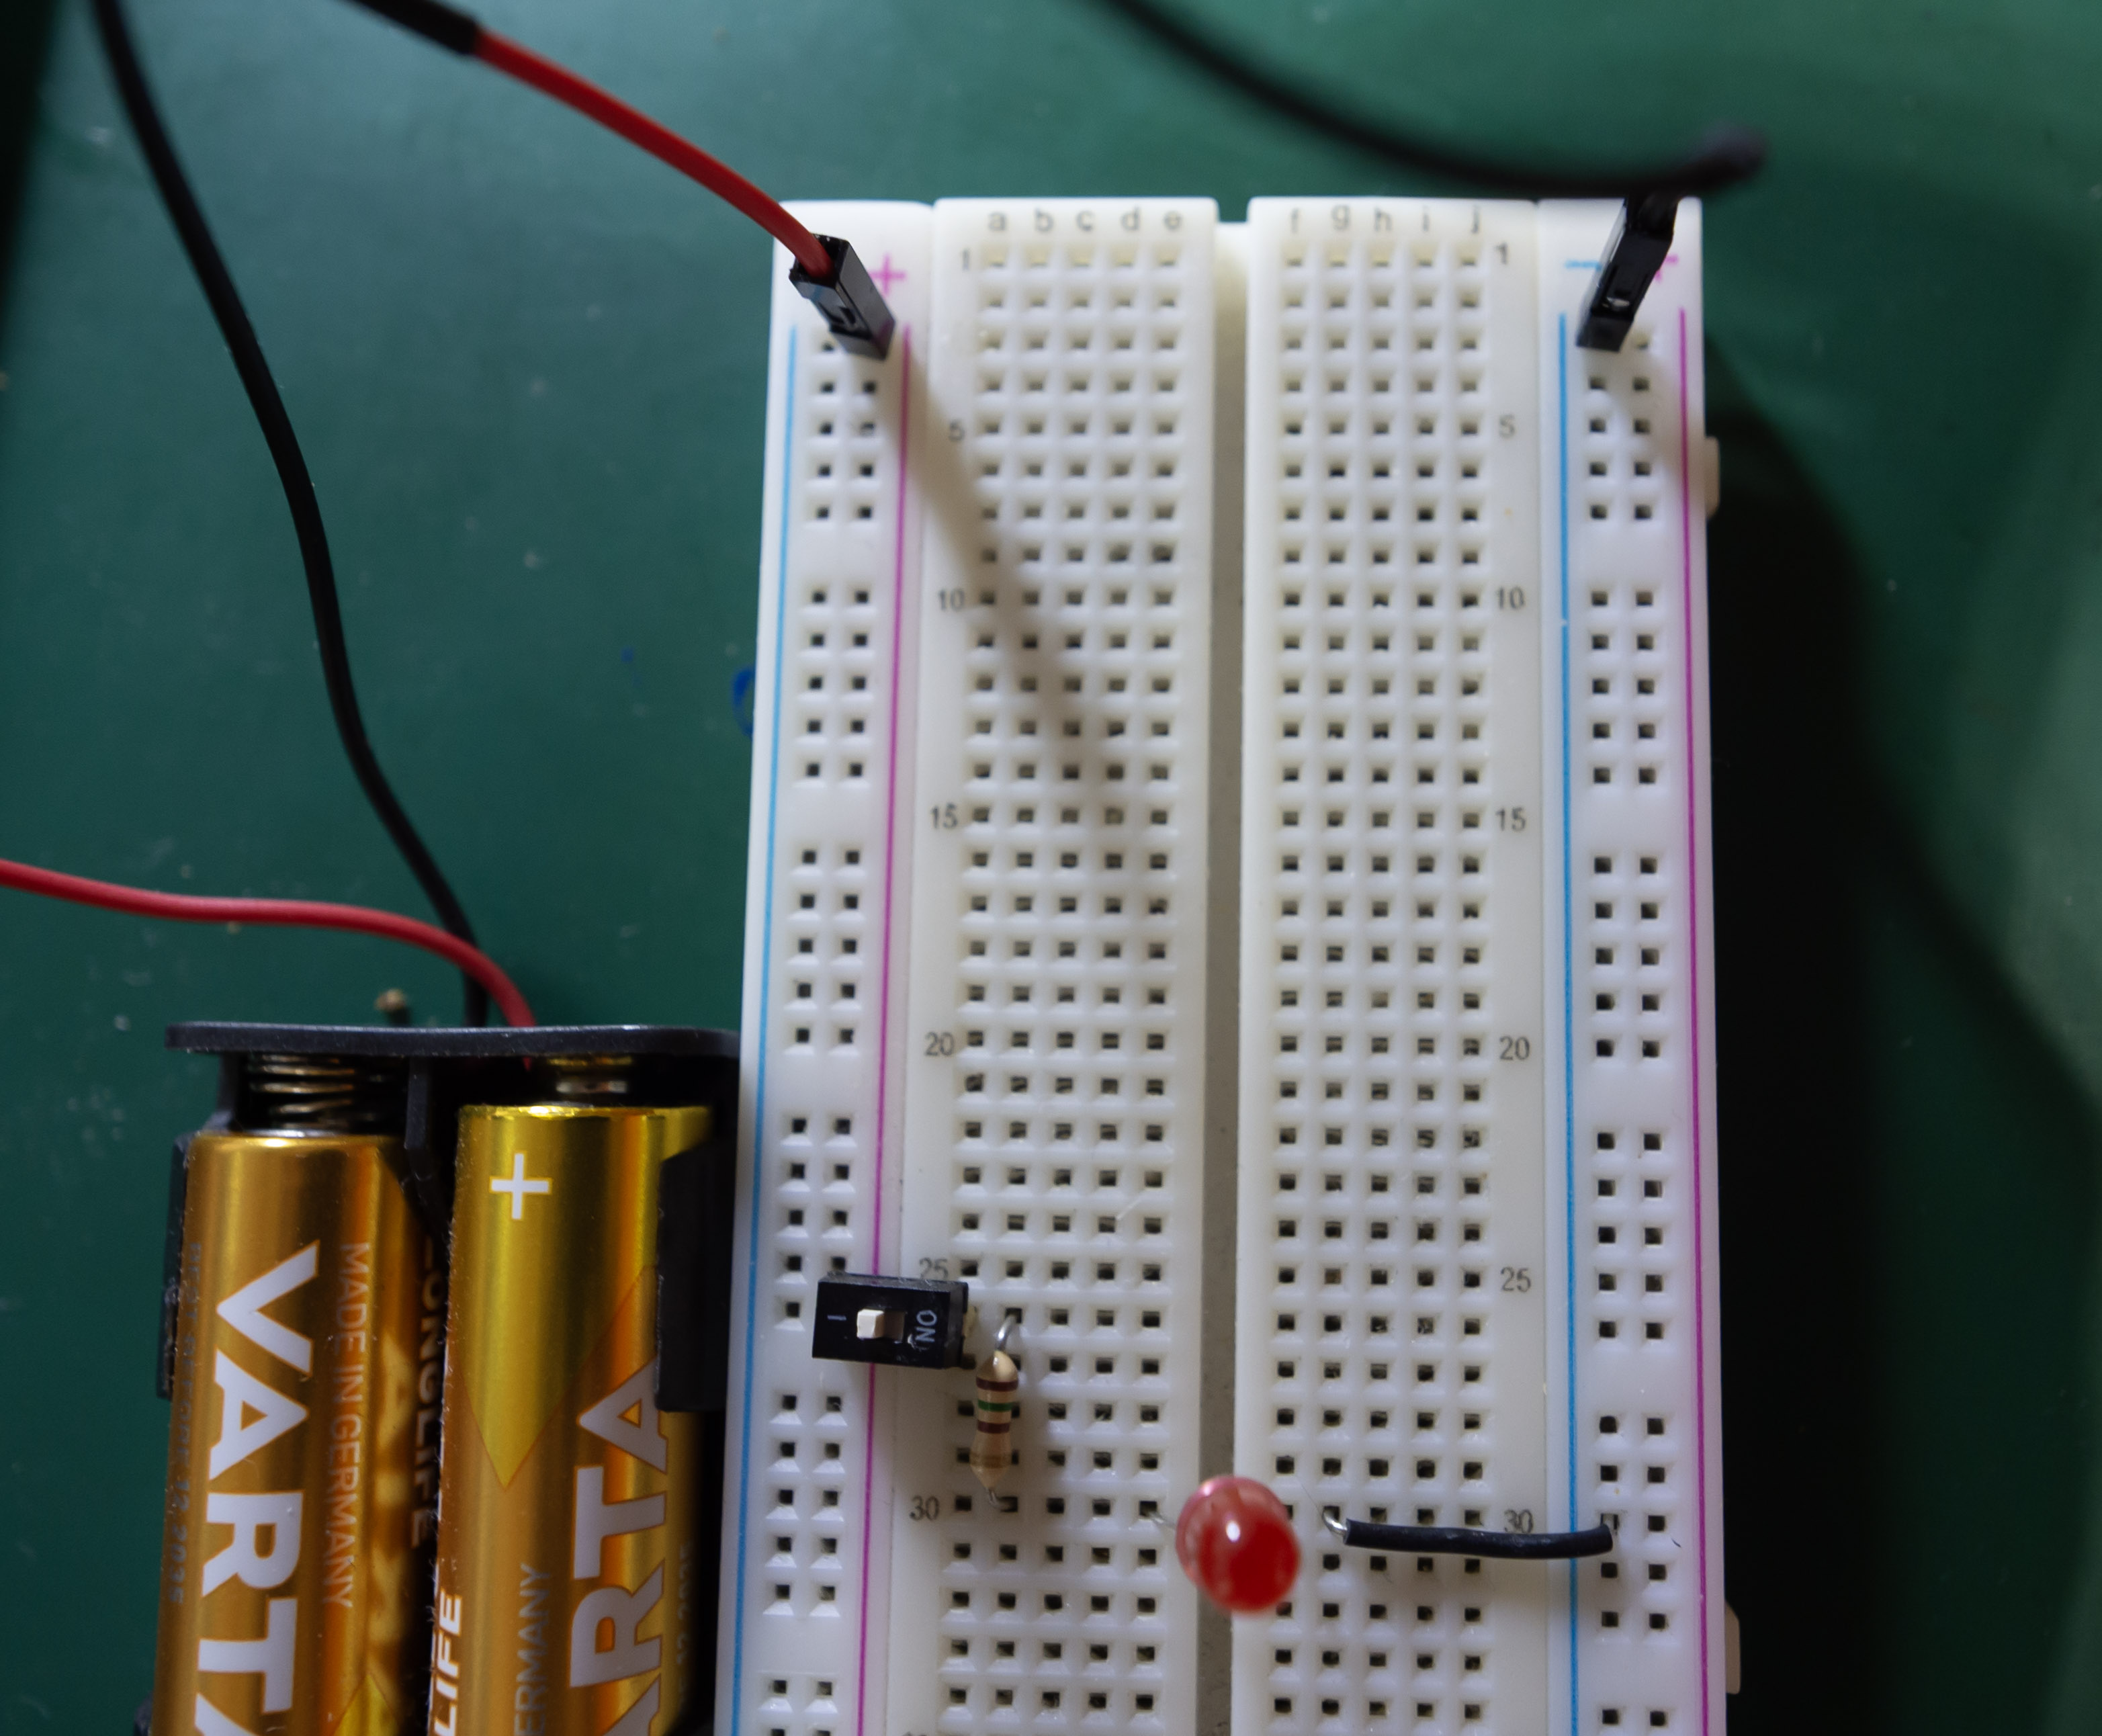
Build: Add the Switch to the LED Circuit
- Place the switch so each side sits on a different breadboard row (so it can break/make the connection).
- Connect the battery holder + to one terminal of the switch.
- From the other switch terminal, go to the resistor, then to the LED’s anode (+).
- Connect the LED’s cathode (−) back to the battery holder −.
- Insert batteries and flip the switch: LED ON. Flip again: LED OFF.
Tip: If the LED doesn’t light, flip it around — LEDs are polarized.
🔹 Circuit Schematic
🔹 Circuit On Breadboard
Recap
- Use a latching ON–OFF (SPST) switch for simple power control.
- Understand markings like ON–OFF, ON–(OFF), OFF–(ON), and ON–ON.
- Always check switch ratings; an underrated switch may work at first but fail early.
- Premade jumper wires and a breadboard with detachable rails make cleaner, easier builds.